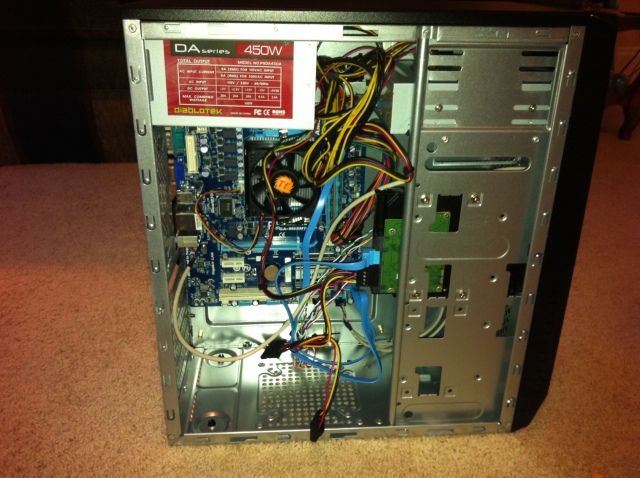
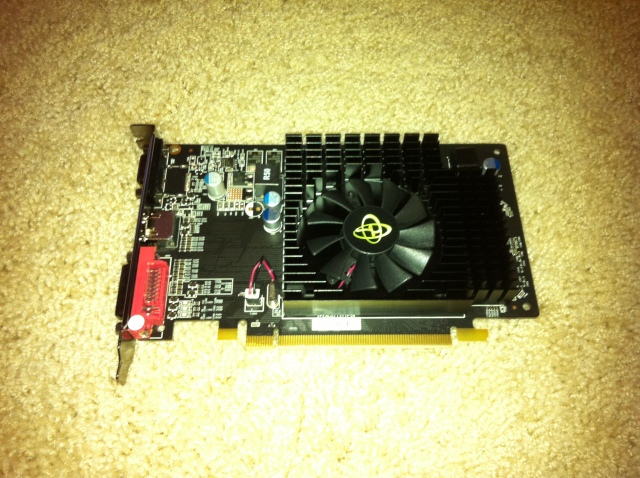
For a long time I have wanted to build my own machine. I wanted something powerful, a beast. The computer I would build could “run NASA” and design jumbo-jets… and this summer, I saved up enough to just do that.
Unfortunately, my budget didn’t cover NASA’s specs and Boeing had to reconsider, but it is still a monster. At the time I knew little about building computers, but I knew the basics. It started when I wanted something that could actually process a video and upload it quickly. I was really into my YouTube Channel at the time and nothing was powerful that I had my hands on. I decided to check out TigerDirect for some cheap powerhouses. The only thing I could find was a little shy of $700, a goal that might take a couple of summers at my rates. Then I came across “barebones PCs” that you build on your own. A barebones PC is a little PC kit that comes with most of the parts in building a desktop computer. Fully customizable, this was just what I wanted. I didn’t know it at the time, but I was stepping in a big puddle and the water was coming through my shoes.
This is all I wanted, a barebones PC that I could equip with an arsenal of parts. You have the motherboard, the processor, the CPU fan, the RAM, the graphics card, the hard drive, the disc drive, etc., I was in heaven. To give it to you straight, I had myself focused on certain specs that could do anything I wanted. As time passes I can upgrade all these parts and keep my monster angry and hungry for more power.
After working an entire summer, 4 days a week, 3-4 hours a day, I came up with around $500. I know that is not that much for working the ENTIRE summer, but I did what any person would do, and try to enjoy their summer while they could. So, NO, I did not work everyday. Back to my point… With this money I had purchase the following parts:
1. GIGABYTE M68MT nForce 630a Socket AM3 Motherboard
2. AMD Phenom II X2 550 Black Edition OEM Processor (3.10 Ghz)
3. Thermaltake CL-P0503 70mm CPU Cooler
4. Lite-On Internal 24X DVD Writer
5. ADATA 4GB DDR3-1333MHz Premier Series Desktop RAM (x2)
6. Seagate Barracuda Green 2TB Hard Drive (3.5″)
7. XFX Radeon HD 5570 1GB DDR3 PCIe 2.1 DirectX 11
8. DiabloTek Elite 450W PSU ATX Mid Tower Case
I ordered the parts Saturday, September 10, 2011. They arrived Tuesday night, around 6:15 pm. Sadly, I was sick Tuesday and Wednesday and did not get to touch it until Wednesday night. I put all the parts together, solving this hog of a puzzle, in about 2 hours (keep in mind this was my first time putting a computer together). I followed the motherboard and mid tower case instructions and had wired everything to exact details. I took it upstairs to my room to connect it to my monitor. The moment of truth…
I plugged in the power supply and connected the VGA to the back. Flipped the switch, hit power. My beast lit up in bright blue and red on the front, cheering with joy… but blank monitor. (insert sadface)
I immediately shut it off, hoping it wouldn’t explode. I grabbed the manual and briskly flipped through it. I power-read for a good 15 minutes and couldn’t figure it out. By about now it was almost 7:30 and I had a lot of homework still. I decided to put it out of my mind and figure it out this weekend.
This is where I stand. I couldn’t stop thinking about it this entire day and I will probably tweak with it tonight. I don’t want to, but if there is no solution, I may I have to accept defeat and take it to professional help. Which (1) I can’t afford (which means having to pay back my dad) and (2) WOULD BE SO WEAK OF ME!
I will look at it again tonight and pray to the gods of “Motherboard Manual” that there is one silly thing I missed that is kicking me in the shins.
If I figure anything out I will post a weekend blog post on what’s going on.
Thanks, Henry


I’m really glad there are people like you who know how to do this kind of stuff because there are people like me who can just barely manage to shut down a computer properly….
Seriously, you just built a computer. That’s not something that you should be even a little frustrated over when one small thing goes wrong. You built a computer out of nothing, and I can’t figure out why pictures, tags, and categories won’t go on my blog…
That is amazing. Whoa. You go Henry! sidenote: have you seen the laptop that can boot up like super fast? like they throw it out a plane and when it turns on a parachute comes out and saves it…. it’s really cool.
What?? Where is this, it sounds cool!
Not only is your computer-building adventure amazing in itself, your writing this week was at a new level. You really made this process of building come alive for the reader–your details, descriptions, and anecdotes were fun to read. GOOD JOB on both accounts!
Hey – did you have to hook up the ATX 12V cable on the mobo also or did you just use the 24 pin connector? Mine won’t fire up!
I just used the 24 pin connector, but like I said, i still cant get it to display on the monitor. I might have a faulty motherboard or something though.
Thanks – that’s what I thought. I wonder if my PSU is faulty? Anyways, for your display issue did you check to make sure the video card is fully snapped into place? On mine it was somewhat difficult to get in because of the bottom pin on the card (I think its gold). Anyways, when I slid the card in that pin would get stuck on the side of the case. The card looked like it was in almost, but not 100%. I had to use a screw driver to gently push the back of the case in while sliding the card into place. Check that out to be sure, and good luck!
Actually the “gold” piece I’m talking about you can see on image you provided…. it is the piece on the very far left, right below the red. that little “pin” for lack of better (or correct) terms, would get stuck and not slide all the way down. hope that clears up what I was trying to previously say.